Monday, January 22, 2024

Earning Badges on Your Own

 Earning Brownie badges outside of the troop can be a fantastic and enjoyable way for young scouts to explore new interests and skills. Here's a guide on how Brownies can embark on badge-earning adventures for fun:

1. Choose a Badge of Interest:

   Encourage Brownies to explore the wide array of Brownie badges available. From outdoor activities to STEM projects, there's a badge for every interest. Let them choose something they're excited about.

2. Plan Badge Activities:

   Once a badge is selected, help Brownies plan activities related to the badge requirements. This could involve visiting local places, attending workshops, or organizing hands-on projects.

3. Connect with Local Experts:

   Reach out to local experts or professionals related to the chosen badge topic. Whether it's a scientist, artist, or community leader, having guest speakers can enhance the learning experience.

4. Explore Nature for Outdoor Badges:

   For outdoor badges, consider nature hikes, camping trips, or visits to botanical gardens. Engage Brownies in activities that connect them with the natural world while fulfilling badge requirements.

5. Creative Badge Workshops:

   Collaborate with local artists, crafters, or makers to organize creative workshops. This could include painting classes, DIY projects, or even a visit to a pottery studio for artistic badges.

6. Volunteer Opportunities:

   Look for local volunteer opportunities that align with badge requirements. This not only helps Brownies earn badges but also instills a sense of community service and empathy.

7. Cooking Adventures:

   For cooking-related badges, organize a fun cooking day where Brownies can learn and create together. Consider recipes that align with badge tasks and make it a tasty learning experience.

8. Science Experiments:

   Delve into STEM badges with engaging science experiments. Simple experiments at home or visits to science centers can make learning about STEM concepts enjoyable. Many science centers, zoos and children's museum have badge offerings that girls can do with or without their troop.

9. Virtual Badge Adventures:

   Explore virtual badge opportunities. Many organizations offer online workshops and activities that fulfill badge requirements, allowing flexibility for Brownies to earn badges at their own pace. The Eastern Missouri council often offers LIVE! Boxes for particular badges where they send boxes of supplies including a badge for girls to earn. We were able to do that a lot during COVID.

10. Retired Badges:

Sometimes we will find an interested retired badge. Some of our favorite Brownie retired badges include Painting, Pottery, Philanthropist, Cookie Counter Try It and Meet My Customers. It's easy to find the requirements and I work with my daughters to find fun activities to complete these badges.

By earning Brownie badges outside of the troop for fun, Brownies not only expand their knowledge and skills but also develop a sense of independence and curiosity. It's a chance for them to explore their passions while enjoying the rewarding journey of badge earning. Happy badging!

Pets - Brownie Badge

 Disclosure: There are some affiliate links below and I may receive commissions for purchases made through the links in this post, but these are all products I recommend. 

How to earn the Brownie Badge, Pets:

My original plan was to take our troop to an animal shelter, but the reality is that we have a troop of 23 girls. Luckily, we had a veterinarian's office manager come to us! One of our co-leader's neighbor volunteered her time to speak to our girls! She was AMAZING! But like all meetings, these Brownies can't sit still for long. This meeting, we implemented mini dry erase boards so the girls aren't shouting at our guest speaker. It worked well... we had some shouting but she was extremely patient!

We have a pretty large troop of Brownies ages 7-9 years. So often, for some of the requirements, I'll break the girls into groups so they can get hands on with the requirement. We meet for 1.5hrs so I also time the stations. My co-leaders will man the station with a mom volunteer if needed. I walk around, get pictures, keep time and answer questions.

1. Find out what care different pets need
Group Activity

Mrs. Laurie, our guest speaker held a discussion with the group and talked about the basic needs of a pet. Food, clean water, and exercise. The girls were able to answer her questions on their dry erase boards. She talked about how our pets need to come to the veterinarian when they are sick and for check ups. She talked about the importance of their checkups and how they need medicine to prevent heartworms. She even had test tube examples of heartworms and tapeworms to show the girls! This was a hit!

2. Keep a pet comfy

Station 1

This was a Station for us. We made 3 large no sew blankets to donate to an animal shelter. The girls have small hands and tying knots is not easy. Keep that in mind when deciding on the quantities. Also, prep this in advance. The blanket does not come pre-cut but luckily the parents stick around and brought fabric scissors.


3. Help a pet stay healthy and safe  & 
4. Make a pet feel loved

Station 2

We did these requirements together. Mrs. Laurie brought her therapy dog and cat. The girls got to pet both animals and answer trivia questions from Mrs. Laurie's talk about how to keep pets healthy and safe.

The therapy dog was a wonderful way to promote well-being, empathy, and responsible pet ownership. We set clear ground rules for the interaction with the therapy dogs and emphasized the importance of gentle behavior, no sudden movements, and not feeding the dogs without permission. We had to define specific areas where the therapy dogs and Girl Scouts can interact. This helps manage the interaction and allows for controlled and supervised encounters.

They learned more about the therapy dog and how they help people.

5. Feed a pet

Station 3:

We home made dog treats with a treat maker. Each girl got to use a real knife, a cutting board, measuring cup. The treats were UGLY, but my dog ate them. We have nut allergies in our troop, so we made a chicken and rice dog treat.

The girls got to chop a rotisserie chicken into tiny pieces. Supervision is a must here!

Our volunteers focused on knife safety here. It was the first time many of these girls had used knives. I think we will make sure we use knives again when we do the Snacks Brownie Badge.


Chicken and Oat Dog Treats

Ingredients:

- 1 cup cooked and shredded chicken (unsalted)

- 1 cup rolled oats

- 1/4 cup chicken broth (low-sodium)

- 1 egg

- Water (as needed)

Instructions:

1. Preheat the Treat Maker:   Preheat your dog treat maker according to the manufacturer's instructions.

2. Prepare the Ingredients:   In a mixing bowl, combine the shredded chicken, rolled oats, chicken broth, and egg. Mix the ingredients thoroughly.

3. Adjust Consistency:  If the dough seems too dry, add water a tablespoon at a time until it forms a firm and workable dough.

4. Load the Treat Maker:   Load the prepared dough into the treat maker. Follow the specific instructions for your treat maker model.

5. Bake the Treats:   Close the treat maker and bake the treats according to the manufacturer's guidelines. Typically, it takes around 5-10 minutes, or until the treats are cooked through.

6. Cool and Serve:   Allow the treats to cool completely before serving them to your dog. The treats should have a firm texture once cooled.

7. Store in an Airtight Container:   Store the treats in an airtight container at room temperature for a week. If you want to keep them longer, refrigerate or freeze the treats.


Supply List

No Sew Blanket

Dog Treat Maker

Mini Dry Erase Boards

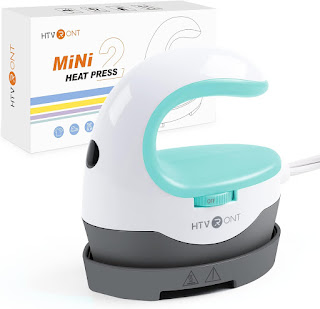
Badge Placement - Handheld Heat Press

Disclosure: There are some affiliate links below and I may receive commissions for purchases made through the links in this post, but these are all products I recommend.

Using a handheld heat press to attach patches and badges to a Girl Scout vest, sash, or smock adds a modern and convenient twist to the traditional sewing method. Plus, I can't sew.


1. Prepare the Surface:

   Ensure the fabric is clean and smooth. Lay out your vest, sash, or smock on a flat, heat-resistant surface.

2. Position the Patches:

   Arrange your patches and badges as desired. Once satisfied with the layout, make sure they are securely in place.

3. Set the Heat Press:

   Heat your handheld press to the recommended temperature for the patches. Consult the instructions provided with the patches or the heat press.

4. Apply Pressure:

   Carefully place the heated press over each patch, applying firm and even pressure. Hold it in place for the recommended time, allowing the adhesive on the back of the patches to bond with the fabric.

5. Cool Down:

   Allow the fabric and patches to cool completely before handling. This ensures a strong and durable bond.

6. Check Adhesion:

   Once cooled, gently tug on the edges of the patches to ensure they are securely attached. If any patches seem loose, repeat the heating process.

7. Enjoy the Finished Look:

   Admire your Girl Scout vest, sash, or smock adorned with perfectly attached patches and badges.

Using a handheld heat press provides a quick and efficient way to showcase accomplishments while maintaining a polished appearance. It's a fantastic alternative for those who prefer a no-sew solution or want to expedite the patching process. This of course isn't fool proof, but easy for the multiple vests I take care of. Some experienced leaders will only sew and hopefully as my girls age, someone can teach us ALL how to sew. Until then, I'm looking for simplicity!


Sunday, January 21, 2024

World Thinking Day SWAPS - Jamaican Flags

Disclosure: There are some affiliate links below and I may receive commissions for purchases made through the links in this post, but these are all products I recommend.


Our troop will attend a district World Thinking Day event and we will represent Jamaica. World Thinking Day is a special day celebrated by Brownie Girl Scouts worldwide. It’s a time when Brownies come together to think about and appreciate the global sisterhood of Girl Scouts and Girl Guides. Activities often include learning about different cultures, exchanging greetings with other troops around the world, and engaging in projects that promote understanding and friendship on an international scale. I am excited to learn more about this country with the girls! As we start to prepare one thing we are bringing to the event is Jamaican flag SWAPS.

In the Girl Scout world, a SWAP (Special Whatchamacallit Affectionately Pinned Somewhere) is a small, handmade craft or trinket exchanged between scouts as a token of friendship. These personalized creations often reflect the interests or personality of the scout making them, adding a fun and meaningful element to scouting events.

We are doing Shrinky Dink flags and with our Easy Bake Oven! Like many moms, you may have an unused Easy Bake Oven in your home like we did. I was about to sell ours until now. We meet in a school so no access to an actual oven, but we will be able to make all 100 Shrinky Dinks in real time!


A Shrinky Dink is a type of craft material that, when heated, shrinks to a smaller, thicker version of its original size. It’s often used for creating small, durable designs or charms for various DIY projects. Your finished Shrinky Dink will shrink to 1/3 of its original size and become 9 times thicker, rigid, while retaining it's color.


The Jamaican flag is a vibrant symbol with meaningful colors. The green represents the lush vegetation of the island, while the gold stands for the sunny and warm climate. The black represents the strength and resilience of the Jamaican people. Together, these colors create a flag that proudly represents the natural beauty and spirit of Jamaica.


These are the ones my daughters finished. They look like Brownies made them and I love them so much.


Instructions

  1. Color the Shrinky Dink plastic on the smooth side with permanent marker.
  2. Punch a hole in the colored Shrinky Dink.
  3. Line your baking sheet with parchment paper.
  4. Bake your Shrinky Dink for 1-2 minutes on 165°.
  5. Allow to cool and attach your safety pin.
Tip: Give your Shrinky Dinks space in between so they don't meld together.

Supplies
Shrinky Dink Paper - this paper is 3"x2" and it's perfect size for a SWAP flag
Easy Bake Oven (optional)

Earning Badges on Your Own

 Earning Brownie badges outside of the troop can be a fantastic and enjoyable way for young scouts to explore new interests and skills. Here...